CUIN7376 Spring 2011

Tuesday, May 3, 2011
Course Conlusion
According to Tim O'Reilly's definition of web 2.0, web 2.0 allows users having rich experiences because it provides a new way to process the information compared to the traditional ways. In CUIN7376, I had the opportunities to experience this new way and understood the attraction of the web 2.0 tools. For me, I learned the basic categories of the web 2.0 tools and how to search the new web 2.0 tools. The most important point is that I had the chances to try these tools and understood the uses of the tools. I experienced that exciting moments that I found the "prefect" tools for Chinese language classroom. I also experienced the moments of confusion because the tool is not good in my classroom or some technical difficulties.
I feel so glad that I can have this course and learned so much in web 2.0 area. I am sure my journey in web 2.0 will continue and I am ready to experience more!
Wednesday, April 27, 2011
Thursday, April 21, 2011
Review of LiveBinder


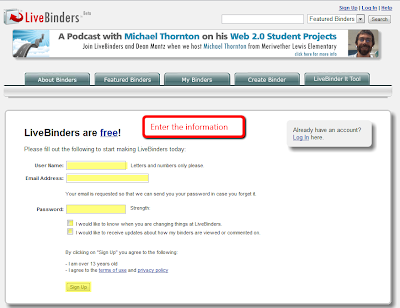 2. Enter the personal account
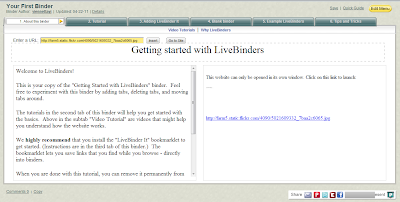


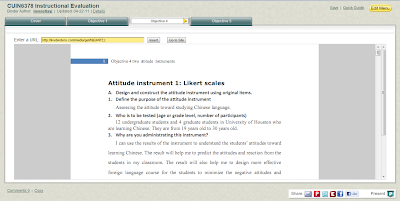


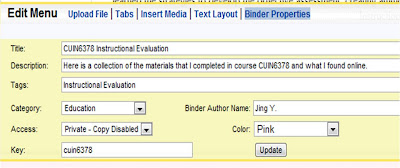


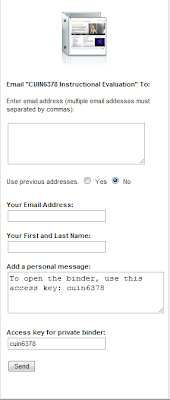
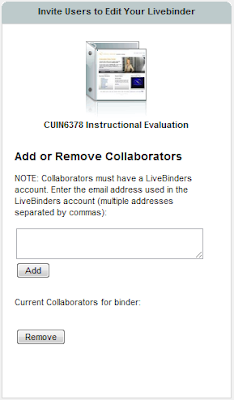

Live binder is an amazing tool that I have ever tried. At first, I just impressed by the idea—online binder. But when I started trying it, I realized it is awesome, especially in education.
As the educators, we don’t need to take the thick binder with us to go to the classroom or go home. All the activities of collecting materials, news, webpages, and all other kinds of stuff can be done online. And we just need to open our online binder when using it in the classroom.
Livebinder allows us to add webpage into the binder. The more useful point is that it is not just a snapshot of the webpage. It is the real webpage, you can click the hotlinks on the page. In this aspect, Livebinder works as a online bookmark collections, but much better than the bookmarks in that we can see the whole page in the binder. After creating the binder, we can share the binder in webpage and anywhere we want.
It is a very cool tool in Chinese language classroom. When learning Chinese language, there are not only the words, tones, spelling, writing that need to be provided to the students, but also some background history, stories and fables, exercises, videos, songs, drama which are interesting for students to extend their knowledge.
So in every class, I can collect all the relative materials in a binder and use in the classroom. After class, I can share the binder with students and parents so that they can read, and watch when they have some time. It will be a pretty good way that parents can help their children in studying Chinese.
Advantages of LiveBinder:
1. No Need to take the binder with us any more
2. Useful collections of the resources
3. Easy to share
4. Convenient to update
5. Support media file
Disadvantages:
1. Like other web 2.0 tools, it depends on internet connection;
2. Have to install the “LiveBinder It” bookmark tool;
3. When pages became more and more, it is not so easy to find the page quickly;
4. The color is so simple that it seems we do not have so many unique choices for our binder.
5. It can only support some format.
I believe LiveBinder will become a very good tool for us in our lives and classrooms. We can use it as personal online binder to collect travel information, educational resources, or collections of other online resources. We can group the different types of recourses and create several different binders for different purposes.
Saturday, April 9, 2011
Personal Learning Network

Monday, March 28, 2011
Review of Google Building Maker and SketchUp
Building Maker:
URL: http://sketchup.google.com/3dwh/buildingmaker.html
Building Maker is a tool allowed users to create 3D model for buildings in Google Earth. After got the models, users can view the building in Google Earth. It is interesting to "create" a city, disctrict, a school, in Google Earth through Googl Building Maker.
Preparation:
You will need to install the Google Earth Plugin in your local computer or laptop. When you click "Try Building Maker", it will show a pop-up reminder to help you download the plugin. After installed the plugin successfully, it will start automatically. And then follow the steps in the "Take a Tour of Building Maker." You will have your own 3-D building in Google Earth after several clicks.


How to use it:
Here are the steps that I took to make a 3-D building of Welcome Center in UH. Take a look you will see how easy it is.
- Choose the country, city and area by scroll the mouse or enter the name in the box on top of the map.


- Select the building you want to create.

- This the most important step in Building Maker. Use the 3-d red rectangle box to align the building in the map. Adjust the angles according to the real situation of the building. And repeat this step in different pictures which were provided in the left side bar.

- After adjusting the model, you can review it in different angle by clicking the pictures on the left side of the screen.

- Enter the name, description, or address of the building.

- When you finished modeling, you can download it or view it in Google Earth.

The Official Tutorial Video about Building Maker:
Building Maker is a very good tool that can be used in classroom. It improve students' ability of viewing and having a sense of 3D objects which will be very important in the courses, such as geometry, geology, art and so on. The educators can use this easy tool to engage students.
Advantages:
1. Easy to use. I don't have any 3D design background. But when I tried Building Maker, I like it so much and have fun with it. It is not necessary to have any formal training. You can see the above picture and watch the video. These materials are enough for you to create a 3D model through Building Maker in Google Earth.
2. Get the result immediately. After you created the model, you can view it in Google Earth. You will have a feeling of sharing it in a very large population.
Disadvantages:
1. Have to download the plugin.
2. Depend on speed of internet connection. I can only do this in university. My home internet connection is too slow to run Google earth.
3. Need a Google account.
Google SketchUp
URL: http://sketchup.google.com/3dwh/buildingmaker.html
Compared to the Building Maker, when I tried SketchUp, I fell in love with it. If I describe the Building Maker as a good tool to play with when you want to share some 3D models in the Google Earth. Then I will describe the SkethUp as a magic tool that I can us to create all kinds of 3D shapes, buildings, furniture or anything you want in several minutes. Before tried SketchUp, I have no experience in creating 3D objects. But now I can do it. It is really exciting!
This is the product I designed by following the tutorial video. It may not be necessary to include such a detailed process of deigning this chair here, because the tutorial said it all. I am sure it is not so difficult as you thought.
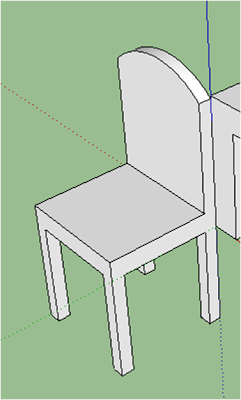
Here is a series of Tutorial video of SketchUp.
http://sketchup.google.com/intl/en/training/videos/new_to_gsu.html
I think SketchUp will be a great tool for students who are interested in designing. Give them opportunity to start their design and have fun in the process of designing. But obviously, SketchUp is more suitable for older students, such as high school level or above. With its functions and unlimited possibilities, people can use it in different ways to design 3D objects.
I am still a learner in using SketchUp. Feel free to leave your comments about your experiences of using this software, or post your works here. Thanks for being here.
Saturday, March 12, 2011
The sample of using Draw Anywhere
Saturday, March 5, 2011
Review of Draw Anywhere
 Name of the tool: Draw Anywhere
URL: http://www.drawanywhere.com/
Category: Critical thinking and problem solving
General impression of Draw Anywhere
Draw Anywhere is an online tool that allow users to draw different kind of flowcharts and diagrams, modifying the diagram anywhere as necessary, and sharing the diagrams. All the operations are in the account within Draw Anywhere which means no software is needed to download. All you need is a web browser with Flash player, such as Internet Explorer. Draw Anywhere provides a 30 days free trial account and two kinds of paid account: 10-User Premium for business users and Single User Premium for home users.

How to use Draw Anywhere
This is the main page of the Draw Anywhere. As you can see the right side of the page is the user "log-in" box for the existing users, "Sign up" button and the "Watch Demo" button for the new users. The left side of the page is the sample album of the diagram. If you click on the diagram, it will bring you to the public diagrams which allow you to have a general impression of the kinds of the diagrams Draw Anywhere can complete. Below the album, you will find the button "Try now"
 Click this button, you will enter the interactive demo page which allow you to try the functions and experience the Draw Anywhere. This is the page you will see after clicked the "Try now" button.
  The top tool bar offers the basic editing tools for you to save, export as a PDF file, cut, copy, paste, delete, undo, redo, print, zoom in, zoom out. You can choose the functions from the "File", "Edit", "Options", "team" on the left side. You can also choose the tools directly from the little function box in the middle part. The right part contains the return to the mouse function, add text, add a circle, add a box, right angled connector and straight line connector.
 The shapes and images are presented in different categories on the left side of the page. As you can see, Draw Anywhere provides basic shapes, Flowchart shapes, Work Flow diagram, Network Objects, Office Layout, Sign & Symbols. Cliparts. the premium user can upload their own images in "My image". But in free trial version, you do not have this option.
The middle of the screen is the "whiteboard" for you to design your diagram.

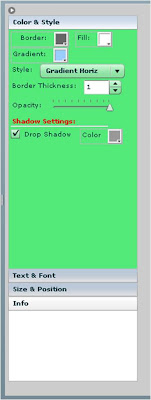 The right side of the page is the property of the shape, you can customize the color, style, text, font, size, and position of the shapes in your diagram.
In fact, the interface of the demo page is same as that you will see in your account. Except one thing, that is, it will ask you whether you want to upgrade to a premium account every time you enter your account.
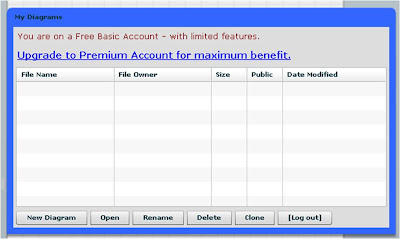 Click New Diagram if you want to start a new one. If your account contains several diagram, they will be shown in this box. You can click the one you want to use or edit. If you start a new diagram, the first step is to set the dimension of the diagram.
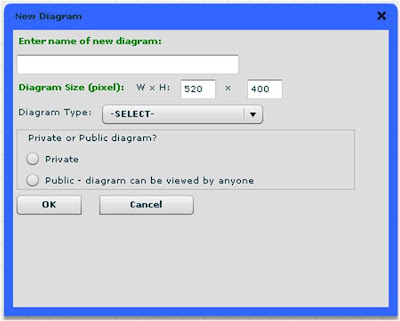 The following steps will be construct a new diagram using the functions mentioned in the demo.
Educational Uses of Draw Anywhere
Draw Anywhere provides the maximum felxibility of using it in different environment to meet the needs of different kinds of users. In education area, Draw Anywhere is good to create diagram for different subjects, such as storyboard in literature, the relationship of the concept in math course and secience curse and so forth.
The diagram created in Draw Anywhere can be easily embedded into website, blog using the provided code. You can find this function in File--export as an image--for web. It will tell you how to do with the code or direct links.
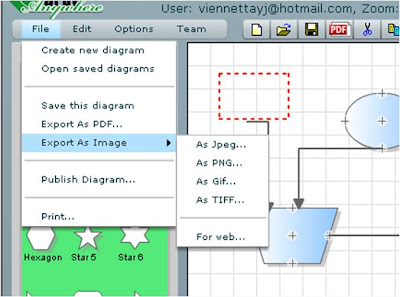 Considering the various kinds of shapes provided, Draw Anywhere can be a pretty good tool in the educational environment. These are the diagrams created by using Draw Anywhere. Take a look and you will get the idea.
Here is the link to official video tour of the Draw Anywhere.
http://www.drawanywhere.com/videotour.aspx
The Advantages of Draw Anywhere
1. Easy to use. Draw Anywhere provides interactive demo for the users to try and practice before they register an account.
2. It suport different shapes and allow users to upload their own images.
3. The final picture can be embedded into website and blog.
The disadvantages of Draw Anywhere
It is not free! This is the most drawback of Draw Anywhere. The free account is only 30 days and it will ask you whether you want to upgrade every time you open the account.
Like I said before, I like free tools and enjoy the free service. Most of the time, the free service is pretty cool and enough for us to experience and use in our work and lives. I believe there are lots of options for us to choose and use. Draw Anywhere is only one of them. It is cool, but it is not free. Although the price is not the most important element we want to take into account when choosing a tool, the price is crucial enough in that we have countless options other than this one. So enjoy your finding and use them.