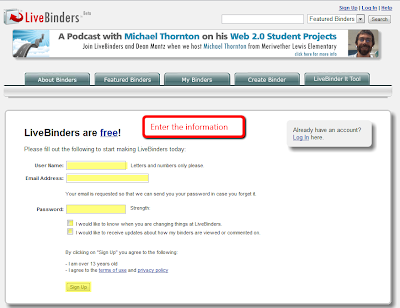
Click the "Sign Up" button on the homepage of the LiveBinder.
After you successfully signed up in the website, you will enter you account. In your account, you will see your first binder which contains tutorial and necessary help information in it. Take a look at it, then you will know how to use it.
3. Read the instruction in "Your first binder"
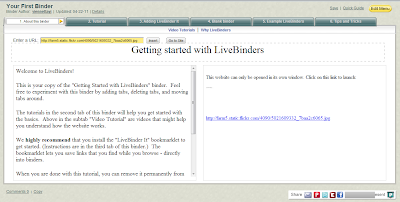
Click your first Binder, you will enter the edit page. There are 6 pages of how to create and use binder provided in this binder. Please read the pages before your work.
1) Create a new binder
In your account, click "Create Binder" it will ask you to enter the general information of the binder: name, description, tags, categories, public or private, access key. If you are not very sure about these information, just enter a rough one. You will be able to change it later in the editing menu. The LiveBinder also asks you whether you want to use Google search to fill the binder. If you want to try it, or if your binder is just a collection of the search, you can use this function. It will give you a binder with different pages of results that searched by your key words in Google.

To start a new binder, you need to figure out which kind of content you want to display in your binder and use the "Edit Menu" to start creating.
2) Upload file
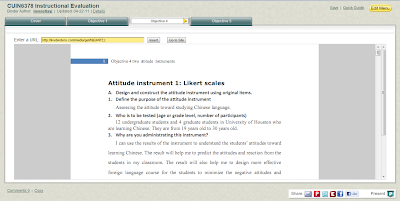
Click "Edit Menu" to display the options of editing in the lower part of the page. If you want to upload a file to the binder, click the "Upload file" tag of the menu and choose file from the computer. Then click "Upload". * LiveBinder can only show the PDF file in the binder. .doc won't show up in the page. So if you want to upload a word file, please save that file into PDF format and then upload it.

This is the uploaded PDF file looked like.
3) Enter the text directly in the page.
Click "Page Layout" tag and select the layout you want to arrange the content. Then you can start enter the text.

4) Insert Media:
LiveBinder also support the media file in the page. Click the "Insertt Media" tag. You will find options: Flickr Image, YouTube Video, Delicious Bookmarks, All my Tags. These formats are the ones that LiveBinder support. If you have the resources from these website, go ahead and use it.
5) Set Binder Properties:
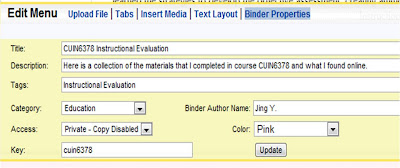
Set the Title, Description, Tags, Category, Access, Key, Author name, color. Author name, Title, Description, Tags and Category are general information of the binder. Access is the privacy setting of the binder: private or public, copyable or non-copyable. Key is for the private use. When you send the link of the binder to you audience, it will ask the audience to enter the key* in order to see the binder. Color is the skin of the binder. Choose your favorite color for you binders.
*LiveBinder allows users to have multiple keys because users can see key when they enter the private binder. So it may be better to have multi-keys. Use comma to separate the keys.
5. Share the binder:
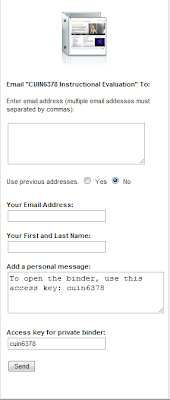
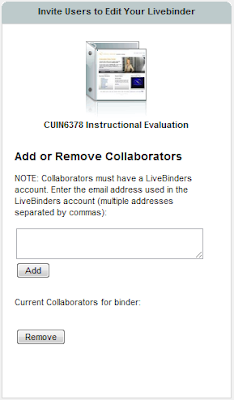
When you finished creating and editing, you are ready to share it. LiveBinder provides different ways for you to share the binder: email, collaborate, embed, make a copy, delete it, copy it and so on.
1) Email it
2) Add collaborators
3) Show Details
If yo click "Show Details", you will see all the general information that you entered in the previous steps will be shown in the right side of the page.
4) Get the embed code

5) Make a copy
Click this option from the list. You will see a copy of the current binder appeared in the acount.
6) Edit it
Enter the edit page, if you click this option.
7) Present
There will be a new window showing the binder. You will have an idea of what is your binder looked like.
8) Delete
Be careful to use this function.
Educational Uses of LiveBinder:
Live binder is an amazing tool that I have ever tried. At first, I just impressed by the idea—online binder. But when I started trying it, I realized it is awesome, especially in education.
As the educators, we don’t need to take the thick binder with us to go to the classroom or go home. All the activities of collecting materials, news, webpages, and all other kinds of stuff can be done online. And we just need to open our online binder when using it in the classroom.
Livebinder allows us to add webpage into the binder. The more useful point is that it is not just a snapshot of the webpage. It is the real webpage, you can click the hotlinks on the page. In this aspect, Livebinder works as a online bookmark collections, but much better than the bookmarks in that we can see the whole page in the binder. After creating the binder, we can share the binder in webpage and anywhere we want.
It is a very cool tool in Chinese language classroom. When learning Chinese language, there are not only the words, tones, spelling, writing that need to be provided to the students, but also some background history, stories and fables, exercises, videos, songs, drama which are interesting for students to extend their knowledge.
So in every class, I can collect all the relative materials in a binder and use in the classroom. After class, I can share the binder with students and parents so that they can read, and watch when they have some time. It will be a pretty good way that parents can help their children in studying Chinese.
Advantages of LiveBinder:
1. No Need to take the binder with us any more
2. Useful collections of the resources
3. Easy to share
4. Convenient to update
5. Support media file
Disadvantages:
1. Like other web 2.0 tools, it depends on internet connection;
2. Have to install the “LiveBinder It” bookmark tool;
3. When pages became more and more, it is not so easy to find the page quickly;
4. The color is so simple that it seems we do not have so many unique choices for our binder.
5. It can only support some format.
I believe LiveBinder will become a very good tool for us in our lives and classrooms. We can use it as personal online binder to collect travel information, educational resources, or collections of other online resources. We can group the different types of recourses and create several different binders for different purposes.


 2. Enter the personal account






No comments:
Post a Comment